Table of Contents
Once categories are set up, teachers and admin can create diary entries for students.
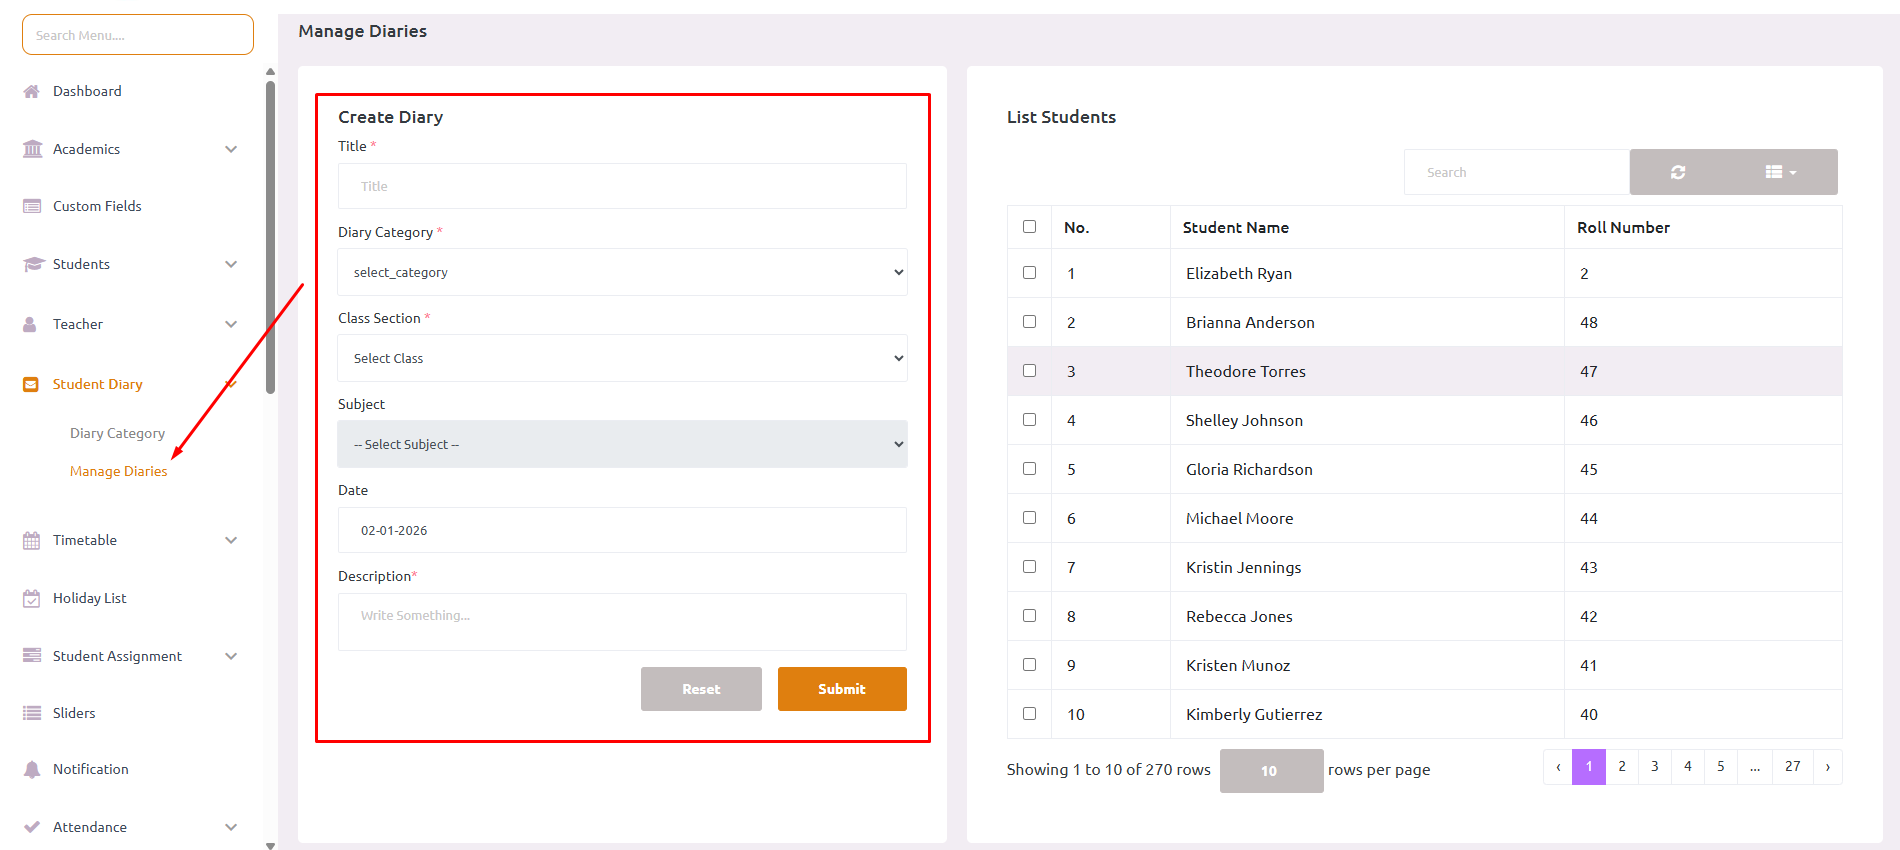
- Go to the Diary section in the admin/teacher panel
- Click on Create Diary button
- Fill in the required information:
- Title (*) – Enter a clear, descriptive title for the diary entry
- Subject – Select the relevant subject (optional)
- Category – Choose from the pre-created categories
- Class – Select the class/grade
- Student Selection – You have two options:
- Specific Students – Select individual students from the class
- All Students – Apply the diary entry to all students in the selected class
- Description – Write detailed notes or comments
- Date – Select the date for the diary entry
- Click Submit to create the diary entry
Important Notes #
- Fields marked with (*) are mandatory
- A diary entry can be sent to multiple students at once
- Teachers can only create entries for classes they are assigned to
- Admins have access to create entries for all classes
- Once created, the diary entry is immediately visible to parents/students in the mobile app
Best Practices #
- 📝 Use clear and concise titles
- 📋 Provide specific details in the description
- 🎯 Choose the appropriate category (positive/negative)
- 💼 Be professional and constructive in your communication
- 🔄 Update diary entries regularly to keep parents informed